Wednesday, December 28, 2011

Paintings for Christmas

During the break I painted some pictures for Christmas gifts. The first one is for my wife Sara's Grandparents. Her Grandma likes Dragons so I thought I would make an attempt to paint them. The second one is for my mom. I painted this one for her newly remodeled kitchen. She wants to make a birdhouse themed kitchen so that is were I got the idea from.
 This dragon one was done in Oil paint on a 18x24 size canvas.
This birdhouse one was done in oil on a 16x20 size canvas.

Thursday, December 15, 2011

Pottery Class

This year I had a pottery class that was very fun. For the last half of the semester we had to come up with new three new projects. My first one was themed, "which came first, the chicken or the egg?" and the second one was a "series of three." and the last was about "gravity."

These photos are about the chicken.


The next set of three are a more practical assignment of three noodle containers for the counter tops. The black one is for lasagna, the red one is for spaghetti, and the yellow and red one is for shell noodles.


This last one is the gravity one. I decided to make a fountain. Its not finished yet. I cant wait to get it all finished and running.


-Special thanks to Ali Lockwood for photography and Willis Coston for helping with the fountain framework.-

Saturday, December 3, 2011

Ford Bronco


This is my final project for my class in 3D texture and my other class 3D lighting. I decided to do the Ford Bronco that is currently in my driveway. The environment is created in VUE a program made by e-onsoftware. The truck is modeled in Autodesk Maya. It is still in the works and I will add more info as soon as I am completely finished.

These are two test renders to make sure things are coming together right. 
 This one is a test render in Vue. For some reason mayas materials are not importing into vue. I will have to figure it out.
 More to come...


These next three are the final images. First one is the ambient occlusion, second one is the wireframe, and third one is the texture render in a studio lighting scene.


This next one is a render in Vue. The render is at a lower setting so it doesn't look as good as I like. I ended up applying vue materials onto the bronco.


Saturday, November 12, 2011

There is a program called Vue made by e-on software that allows you to create landscapes fairly easily. I am new to it and have only just touched the surface, but with my little knowledge and the help of a tutorial from this site http://vimeo.com/groups/19298/videos/6891644 I was able to make something. My hopes are to learn this well enough to use along side maya as a tool to create scenes that involve the outdoors.

Friday, November 4, 2011

Jabba the Hutt

In my pottery class one of the assignments was to create a pinch pot deity. So after browsing online for ideas I came across Jabba the Hutt. It was the winner. Pinch pot is a technique were you pinch clay with your hands to form a bowl shape. I created two bowls and then scored the tops. I connected the two bowls with slip and proceeded to add arms, head, and tail. The arms and tail are flat sheets of clay molded into a pipe like form. After it was fired I painted it with acrylic paints.

Sunday, October 9, 2011

Space Station ( Si-Fi )

I am attempting to create a space station in Maya. This station is large enough to house millions of people. The station is connected to 6 moons. Each moon rotates on its own axis to create a level of gravity. With all six moons the station is able to orbit around a planet which helps to create the gravity the people living there need. Each moon is used to gather resources and farm. Coming soon is detailed diagrams and screen shots to show my progression.
As I modeled I did ambient occlusion renders to see the how it was forming. I wanted to see how the shadows would affect the shapes. These are still early on in the processes, I got most of the main modeling finished.


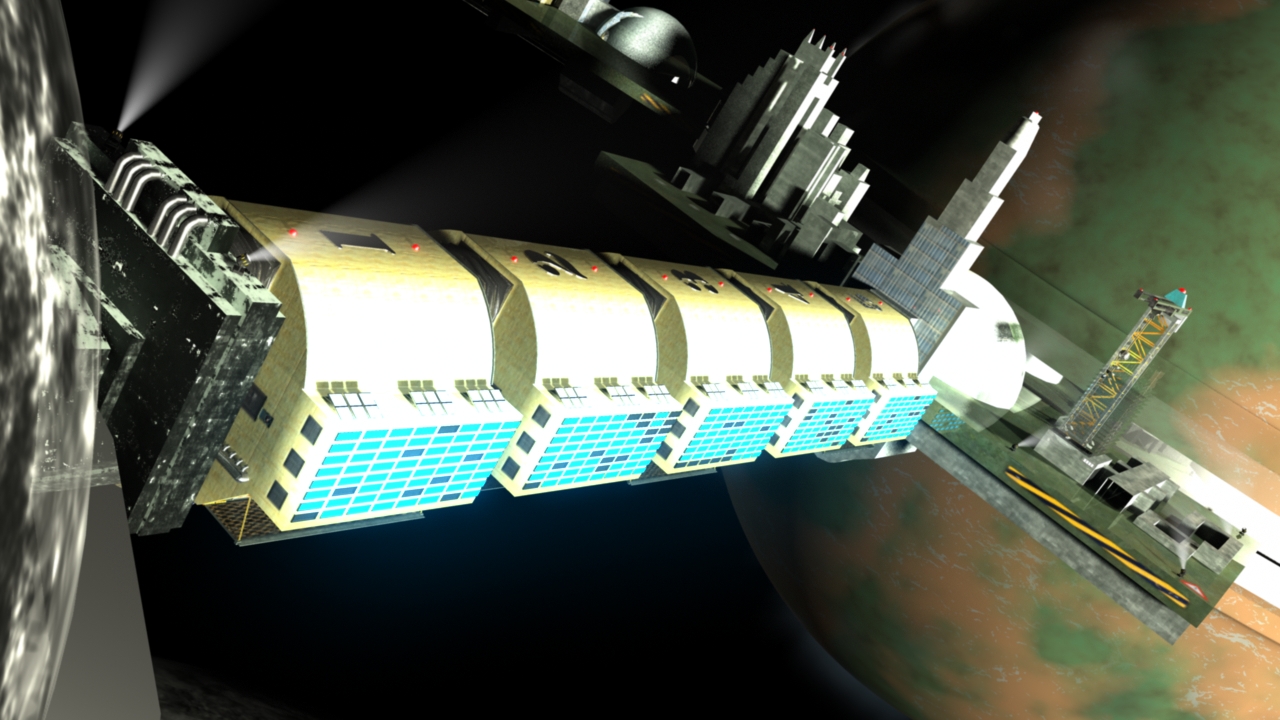
 This image was to see how it the scale looked in comparison to a planet. It only has four extensions which changes later as you can see in the last image.


This image shows up close the rail system that runs underneath the resident sections. The rail is meant for transporting goods and people.
 This is the main shape when finished.
I started to add the detail.

I started to build the city and unwrap the model.
Started to add textures to the model
Close ups on the crane.
Close ups on the resident section.
Close up on the rail system.
I started to experiment with the spheres.
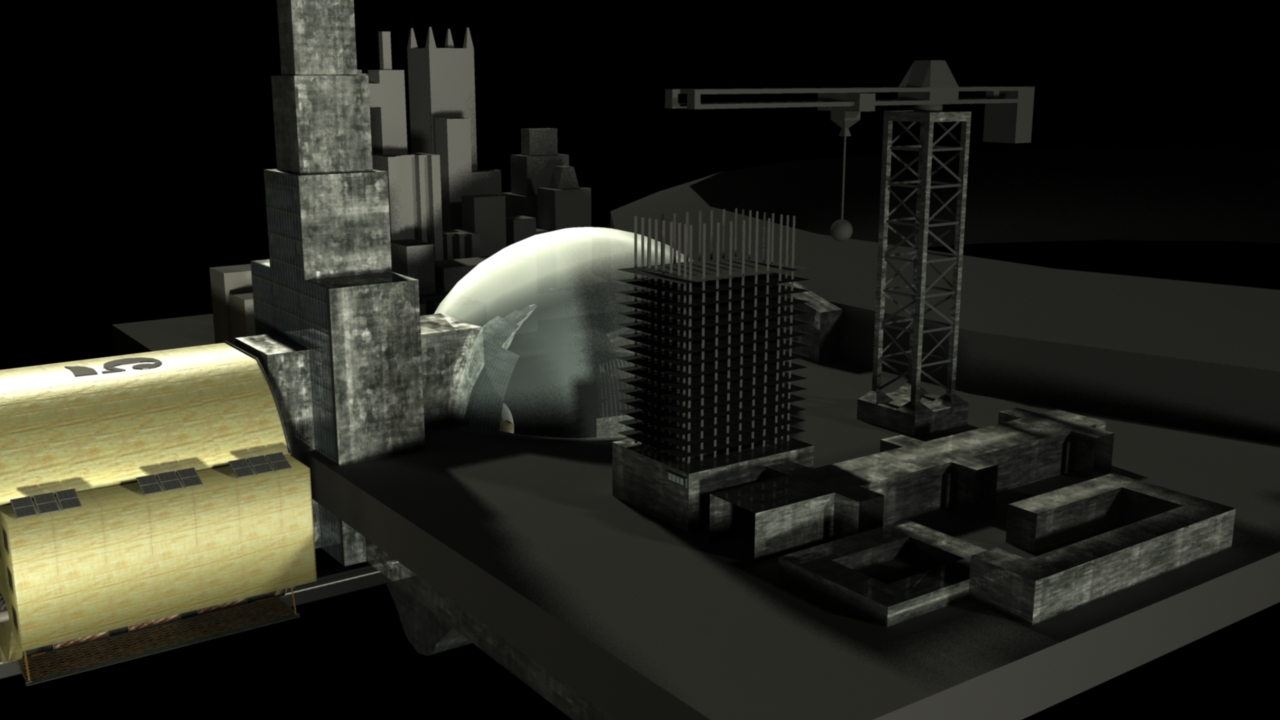
Tried to create a night scene with only parts illuminated.


No lights directly shinning on the object.

I wanted to make spotlights but with an atmosphere to show they are on.

This is a view with everything in it.

This is the underneath view of the residence and rail.

Dark scene with all 5 sections attached.

Another scene with all 5 sections. 
Yet another wide shot!

I brightened the light to attempt at making it look like the sun was shinning right on it.

These are the Texture layers I created in photoshop. I mostly just layered images; little painting.
Texture for the city.

Texture for the city floor and crane parts.

Texture for the main tower.

Texture for the Rail system.

Texture for the residence sections.
I can say that I learned allot from this project. I think my understanding of textures and lights are a little bit better. I had to do some research to make a spot light with some atmosphere. It was kind of difficult so maybe in the future I will make another tutorial on how I made mine.